Get A Quote Now!

How to Connect a Portable Solar Panel to an RV Battery
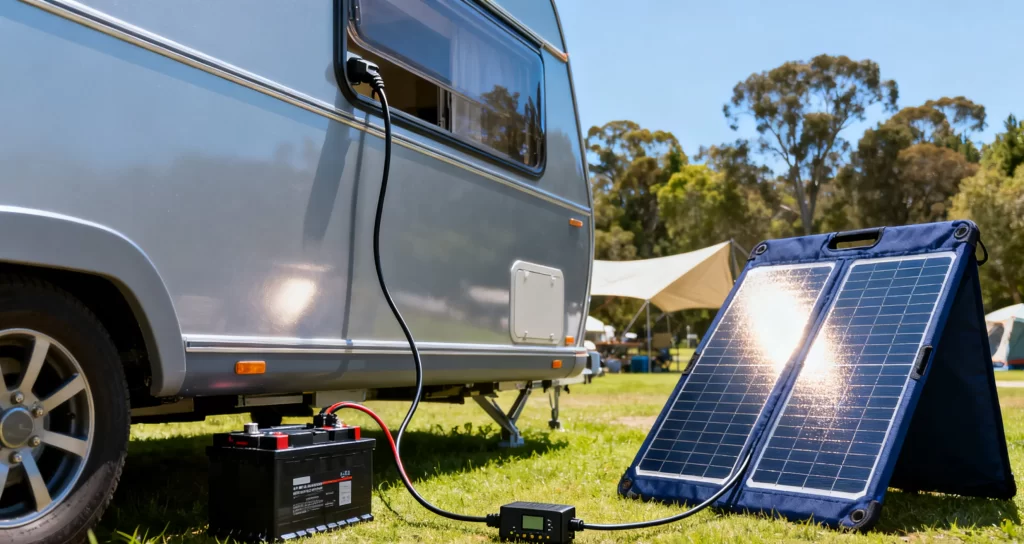
Harnessing the power of solar panels on an RV has become one of the easiest ways to keep batteries charged in an off-grid manner. It is quite simple once you learn how a portable solar panel works, how the charge controller protects your battery, and what steps keep the system safe. This guide shows precisely how to connect a portable solar panel to an RV battery in an easy, user-friendly manner.
According to NREL: A Consumer’s Guide to Solar Electricity, photovoltaic systems work best when panels receive direct sunlight and use well-matched wiring and controls, that principle is the foundation for a reliable RV setup.
What You Need Before Connecting a Solar Panel to an RV Battery
It helps to know, before anything in the way of wiring is done, exactly how this basic flow of energy works: the portable solar panel gathers sunlight, the charge controller regulates the current, and the battery stores it. This simple sequence protects the battery from overcharging and improves long-term performance.
Understanding How RV Solar Charging Works
A portable solar panel produces direct current. That electricity varies with sun angle and needs regulation before reaching the battery. Regulation of this electricity is the job of the solar charge controller. It prevents voltage spikes and limits current so that the battery receives a clean charge. Without a controller, the battery would slowly degrade.
Components You Need to Have Before Installation
To get started, you need the following items.
- Portable solar panel
- Charge controller
- MC4 connectors or compatible plugs
- Extension cables
- Fused battery leads
- Multimeter
- Deep cycle RV battery or bank
This small collection provides you with everything needed for a safe system. Having these pieces organized reduces the likelihood of wiring errors.
How to Connect a Portable Solar Panel to RV Batteries: A Step-by-Step Guide
Every RV setup is slightly different, and these steps follow the most common wiring layout, matching manufacturer instructions for well-known off-grid systems.
Step 1: Position the Portable Solar Panel Properly
Place the portable solar panel in an open and sunny area. Keep it close to the RV, but far enough away so that the roof’s shadow does not fall on it. Generally speaking, a tilt that roughly matches the local latitude improves energy capture. If you find that the shadows are moving during the day, reposition it for consistent exposure.
Step 2: Connect the Solar Charge Controller
Place the controller where it stays dry and is easy to access. Most controllers label ports for panel and battery. Start with connecting the panel leads to the controller. The polarity markings help avoid reversed wiring. A reversed connection will prevent charging but will not damage the panel if you catch the mistake early.
In 2021, a couple traveling across Arizona used a 100 watt portable solar panel with a small charge controller inside their RV pantry cabinet. They chose this location because it remained cool and allowed them to see the indicator lights every evening. That simple placement helped them catch a loose connector early in their trip, and their battery remained healthy for months.
Step 3: Attach the Controller to the RV Battery Safely
Connect the controller to the battery using fused leads. Positive first, negative second. A fuse reduces the chance of a short circuit in case the cables are pinched or damaged. From U.S. DOE: Energy Storage Safety Strategic Plan, proper circuit protection is amongst the simplest ways to reduce failure in small energy systems.
Then, make sure the controller recognizes the type of battery. Some controllers will use lithium, AGM, or flooded lead acid settings. Selecting an improper type can lead to a reduction in charging efficiency.
Step 4: Monitor Voltage and Charging Efficiency
With the system running, voltage can be checked with a multimeter. A resting lead-acid battery often reads close to twelve point six volts, though lithium batteries show much higher resting values. The controller screen can be watched to verify charging flow. Most controllers will show panel voltage, current, and state of charge. A few minutes of observation helps you confirm that sunlight is reaching the panel, and energy is flowing correctly.
How to Choose the Right Portable Solar Panel for Your RV
Picking the right size and type of panel defines how often you need to move it and how fast your battery will charge. The portable solar panel is lighter compared to the fixed roof panels; it works particularly well for boondocking or campgrounds with trees.
Fixed Solar Panel and Portable Solar Panel Differences
A fixed panel remains on the roof and usually makes more total energy, as you never forget to deploy it. A portable solar panel gives flexible ground placement with better angles. If you camp under trees, a portable option usually performs better because you can chase the sun in open spaces.
How Much Wattage You Actually Need for an RV
A small RV with LED lighting and minimal appliance use often uses one hundred to two hundred watts for stable charging. Larger RVs that make use of inverters or that have multiple batteries may need three hundred watts or more. What size you need depends on your daily consumption. If you regularly drain the battery below fifty percent, consider adding more panel capacity.
This simple comparison may help you.
| Panel Type | Typical Wattage | Portability | Best Use Case |
| Portable solar panel | 80 to 200 W | Easy to move | Shaded campsites or flexible placement |
| Fixed roof panel | 100 to 400 W | Permanent | Long stays or frequent high loads |
Common Mistakes When Hooking a Portable Solar Panel to an RV Battery
Understanding mistakes will help avoid slow charging, weak battery life, or early failure of the equipment.
Mistake 1: Hooking Up Directly Without a Controller
Never connect the solar panel to the battery directly. It may appear to charge for some time, but unregulated current slowly harms the cells.
Mistake 2: Mixing Different Battery Types Incorrectly
Mixing lithium and lead acid batteries leads to charging imbalance. Each chemistry requires different charging profiles. As per IEA: Trends in Photovoltaic Applications 2023, battery compatibility also plays an important role in maintaining long-term system performance.
Mistake 3: Using Undersized Wiring or Wrong Connectors
Thin wires restrict current and generate heat. Always select cables sized for the predicted current. Anderson plugs or MC4 connectors generally offer superior contact points compared with generic clamps.
In 2022, an RV rental company in Colorado documented frequent low charge complaints. Inspecting technicians found that customers were often using small, clip-on leads meant for trickle chargers. Swapping those out for thicker MC4 cables made many customer reports of poor performance just about disappear.
How to Maintain Your RV Solar Panel Setup for Long-Term Use
Once connected, a solar system can run for years with simple care. The main problems that may occur are dust, loose connections, and battery aging.
Cleaning and Seasonal Maintenance Tips
Wipe the panel surface when dust or pollen accumulates. Keep cables dry and check connectors every few weeks. During winter storage, disconnect the panel but continue to use the charge controller to maintain the battery at safe levels if sunlight is available.
Checking Battery Health and Improving Lifespan
Watch resting voltage to ensure that the battery stays above recommended levels of discharge. Lithium batteries like shallow cycles. Lead acid batteries like full charges often. A small habit of checking voltage prevents unpleasant surprises during travels.
Final Tips for Safe and Efficient Solar Panel Use
A portable solar panel can keep the RV battery healthy for extended stays, short trips, or remote campsites. With careful wiring, thoughtful placement, and good charging habits, the performance of these units will be steady for several years. If you’re interested in more ways to improve your RV electrical system, you might want to take a look at our mobile power planning guide.